How to Restore Cloudy Headlights Properly

A yellow, hazy headlight can make an otherwise well-kept car look tired before anyone notices the paintwork. More importantly, it reduces the amount of light reaching the road at night. Knowing how to restore cloudy headlights means looking beyond a quick polish: the best result comes from removing damaged material evenly, refining the lens clearly, and protecting it from UV exposure afterwards.
Cloudiness is not always the same problem. Some lenses only need a light correction, while others are deeply oxidised, crazed or cloudy on the inside. Choosing the right approach protects the headlight and gives your car the crisp, cared-for finish it deserves.
Why headlights become cloudy
Most modern headlights use polycarbonate plastic rather than glass. It is durable and lightweight, but years of sunlight, heat, rain, road grime and washing gradually break down its clear outer coating. The surface then oxidises, creating the familiar yellow or milky appearance.
Fine scratches add to the problem. They scatter light instead of allowing it to pass through the lens cleanly, which can leave low-beam performance noticeably weaker on unlit roads. Parking outdoors, coastal conditions and regular exposure to harsh sunlight can speed up the process.
Occasionally, the haze is inside the headlight assembly rather than on the outside. Condensation, a failed seal or damage to the internal reflector cannot be fixed with sanding and polishing. Before starting, run a clean hand over the lens. If it feels rough or dull on the outside, restoration is likely worthwhile. If it feels smooth but still looks foggy, the issue may be internal.
How to restore cloudy headlights: assess first
Inspect both headlights in good daylight, preferably after washing the front of the vehicle. Look for yellowing, dullness, peeling coating, stone-chip damage and cracks. Compare the two lenses, as one side often receives more sun or weather exposure than the other.
A lightly hazed lens may respond well to a finishing polish and a proper UV protectant. Heavy yellowing or peeling coating needs a more thorough correction with controlled sanding. Deep cracks, severe pitting or internal clouding may call for replacement rather than restoration.
This assessment matters because aggressive sanding on a lens that only needs a polish removes more material than necessary. On the other hand, polishing heavily oxidised plastic without levelling the damaged layer may create temporary shine but leave the yellowing underneath.
What you need for a careful DIY restoration
A quality restoration can be done at home if you are patient, have a sheltered work area and are comfortable working precisely around paintwork. You will need car shampoo, clean microfibre towels, masking tape, wet-and-dry sandpaper in several grades, a spray bottle of clean water, a plastic polishing compound, applicator pads or a small dual-action polisher, and a dedicated UV-resistant headlight coating.
The coating is not an optional final flourish. Sanding removes the failed factory UV layer along with the oxidation. Without a replacement protective coating, a freshly clear lens can yellow again surprisingly quickly. A ceramic coating may add some protection, but a purpose-made headlight coating is generally the better choice after sanding.
Avoid household shortcuts such as toothpaste, insect repellent or abrasive scouring pads. They can make a headlight appear clearer for a short time, but they do not correct the surface properly or provide lasting protection. Some can scratch the lens or leave residue that interferes with a coating.
The restoration process, step by step
Clean and mask the work area
Wash the lenses and surrounding panels thoroughly, then dry them. Any grit caught under a pad or sandpaper can create deeper scratches. Apply automotive masking tape around the edge of each headlight, including painted panels, trim and the bumper where needed. Take time here: protecting the surrounding finish is part of doing the job properly.
Sand away oxidation evenly
For heavily oxidised lenses, begin with the least aggressive paper that will remove the damage. This is often around 1,000 or 1,500 grit, although badly peeling coatings may need a coarser starting point. Keep the lens and paper wet, use light, even pressure, and sand in one consistent direction.
The lens will turn uniformly dull while the damaged coating is being levelled. That is expected. What you do not want are isolated shiny patches, because they usually indicate remaining oxidation or uneven sanding.
Move through progressively finer grades, changing the sanding direction with each stage. This makes it easier to see when the scratches from the previous grade have been removed. Finish with a fine grit suitable for polishing. Rinse the lens and wipe it clean between stages so you can inspect your progress rather than guess.
Do not rush this part. Most poor restorations happen when someone jumps from coarse sanding straight to polish. The compound cannot reliably remove deep sanding marks, and the lens may look clear in shade but show haze when headlights are switched on.
Polish for optical clarity
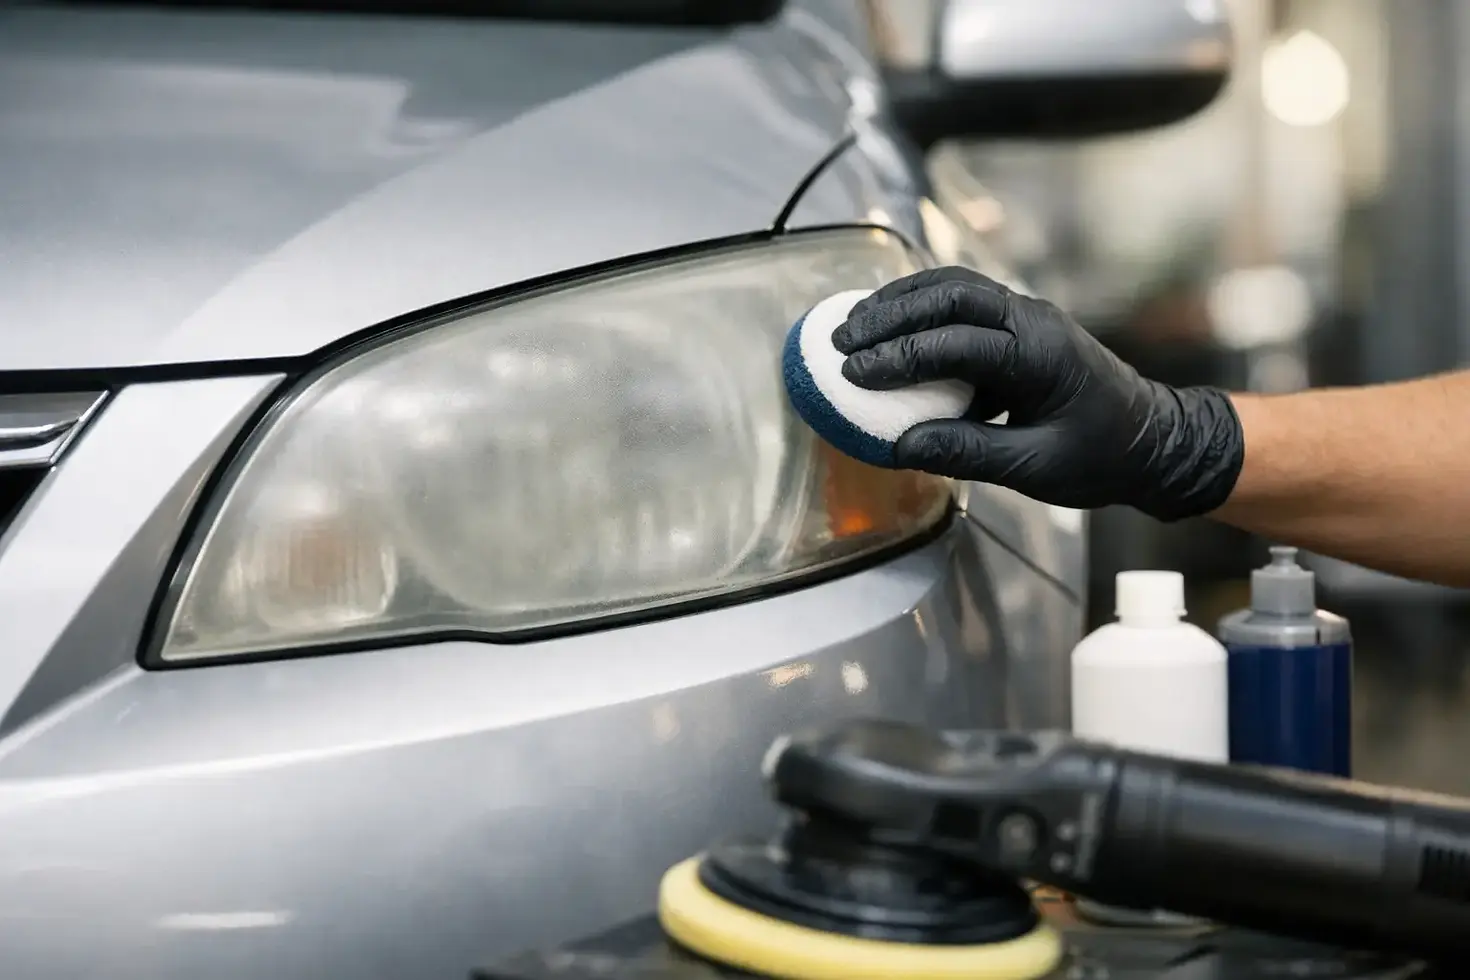
Once the sanding marks are refined, use a plastic polish with a foam applicator or dual-action machine polisher. Work a small amount of product across the lens until the clarity returns, then remove residue with a clean microfibre towel.
Keep machine speed and pressure controlled. Excess heat can stress plastic, especially on older lenses. If you are polishing by hand, expect to spend more time, but work in small sections and check the finish regularly. The goal is a sharp, even clarity rather than a rushed glossy patch in the centre.
Apply UV protection
After polishing, ensure the headlight is completely clean and dry. Apply the chosen UV coating exactly as directed, working in a dust-free, shaded area. Most coatings need time to cure before the vehicle is washed or exposed to heavy rain, so plan the job around the weather.
A correctly applied coating seals the restored surface and helps preserve its clarity. It also makes routine washing easier by reducing the grip of road film and contamination.
Common mistakes that shorten the result
The most common mistake is stopping after polish. The headlight looks excellent for a few weeks, then the untreated plastic begins oxidising again. Skipping sanding on a badly degraded lens is another false economy, as surface polish alone cannot remove failed coating below the surface.
Uneven pressure, dry sanding, insufficient masking and using one piece of sandpaper for too long can all leave visible marks. So can trying to restore headlights in direct sun, where products dry too quickly and heat makes the plastic harder to work safely.
There is also a point where restoration is no longer the sensible choice. If the lens has major cracks, internal moisture, damaged mounting points or a deteriorated reflector, it needs a different repair. Clear plastic on the outside will not solve a headlight that is compromised within.
When professional restoration is the better option
DIY restoration suits a confident owner dealing with mild to moderate external haze. Professional headlight restoration is a smarter investment when lenses are severely yellowed, coating failure is widespread, your car has complex light units, or you want a consistent finish without risking nearby paint and trim.
A detailing specialist can assess the lens condition, select the correct correction process and apply durable protection with the right preparation. The benefit is not simply brighter-looking headlights. It is a more refined front-end appearance, improved night-time visibility and a result that complements the standard of care you give the rest of your vehicle.
For Curepipe drivers who want their headlights restored with the same precision applied to paintwork and interior finishes, Younique Detailing Co Ltd can provide a tailored professional solution. Clear headlights change the way a car presents from the first glance - and a protected result helps it stay that way.


Comments